Overview
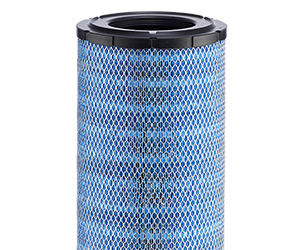
The ERA RadialSeal™ air cleaner series delivers a reliable filtration system for your engine with simplified filter service.
Air Cleaner Features
- Black, corrosion and chemical resistant polymer paint retains its finish through all types of weather
- Available in:
- 279 mm / 11 in. in diameter
- 330 mm / 13 in. in diameter
- 381 mm / 15 in. in diameter
- Order inlet hoods separately
- Double airflow throughput by using two air cleaners
- Vacuator™ Valve automatically expels moisture from bottom of housing
Filter Features
- RadialSeal sealing technology — high tech resilient urethane ends that hold the filter firmly in place and maintain a tight, reliable seal — reduces the number of components and ensures reliability
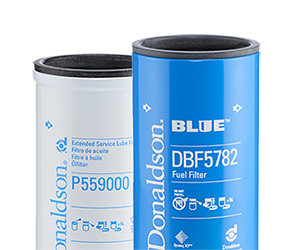
- Donaldson Blue high efficiency, extended service filters are available. Donaldson Blue filters capture sub-micron contaminant, such as soot and carbon, which promotes lower restriction and longer filter life
Benefits
- Sure sealing system
- Donaldson Blue® high efficiency, extended service filters are available.
Applications
- Replacement for the Donaldson EBA cylindrical-shaped axial seal style air cleaner
- Light dust, single-stage air cleaner
- Vertical installation, mounted on the side of the truck
- Primarily for on-highway trucks
- Can be installed on driver or passenger’s side
- Allows up to 38.2 m³/min / 1350 cfm airflow throughput per air cleaner
Resources
Service
This servicing information is provided as a best practices guide. It is not intended to replace or supersede the service instructions supplied by your engine or vehicle manufacturer.

1. Check the restriction
Replace the filter only when the restriction level has reached the maximum recommended by the engine or equipment manufacturer or on a regular service schedule. Restriction indicators, mounted on the air cleaner system are recommended for keeping an eye on restriction levels and indicating when servicing is due.

2. Remove the filter
Unfasten or unlatch the service cover.
Because the filter fits tightly over the outlet tube to create the critical seal, there will be some initial resistance, similar to breaking the seal on a jar. Gently move the end of the filter back and forth to break the seal. Rotate while pulling the filter straight out. Avoid knocking the filter against the housing.

3. Check the Vacuator™ Valve
If your air cleaner is equipped with a Vacuator Valve, visually check and physically squeeze it. Make sure the valve is flexible and not inverted, damaged or plugged.

4. Inspect the old filter
Inspect the old filter for any signs of leaks. A streak of dust on the clean side of the filter is a telltale sign. Eliminate any source of air leaks before installing the new primary filter.

5. Clean both surfaces of the outlet tube
Use a clean damp cloth to wipe the filter sealing surface and the inside of the outlet tube. Contaminant on the sealing surface could hinder an effective seal and cause leakage.

6. Inspect the new filter
Visually inspect the new filter, paying special attention to the sealing area which is inside the open end. As you inspect the filter’s RadialSeal™ take care not to wipe the sealing surface. The factory has placed a dry lubricant on the seal which aids in installation and removal.
Never install a damaged filter.

7. Insert the new filter
Seat the filter by hand, making certain it is completely inserted into the air cleaner housing before securing the cover in place. To complete a tight seal, apply pressure by hand at the outer rim of the filter, not the flexible center. Never use the service cover to push the filter into place since no cover pressure is required to hold the seal.
Note that a cover gasket is usually supplied with ERA replacement filters. It is important that it be fitted at the same time as the new filter to ensure that the housing is airtight.
Using the cover to apply pressure could damage the housing and cover fasteners, and will void the warranty. If the new filter is not fully in place, remove the cover and push the filter further into the air cleaner with hand pressure on the outer rim. The cover should then go on with no extra force. Then, secure the service cover.

8. Check connectors for a tight fit
Make sure restriction indicators are reset and in proper working order. Verify that all mounting bands, clamps, bolts, and connections in the entire air cleaner system are tight. Check for holes in piping and repair or replace as needed. Any leaks in the intake piping will admit dust directly to the engine.


