Overview
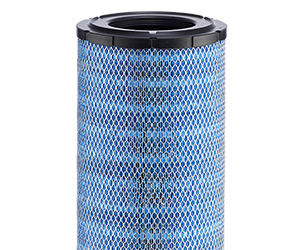
The FKB series is a family of two-stage air cleaners for medium dust conditions. Made with heavy-duty plastic and non-metal filters, the air cleaner is lighter, more efficient, and easier to install and replace than competing products.

Features
- Smaller in diameter compared to competitive brands with similar airflow
- Improved handling and maintenance — lighter and smaller, changing filters is a snap
- Improved filter disposal ease — no metal
- Unique twist and lock filters ensure proper positioning during filter service
- FKB air cleaner assemblies include primary and safety filters
- Two-stage design features a built-in pre-cleaner that separates up to 85% of airborne contaminants
- Cover latch position allows for minimum service clearance and eases filter service
- Built-in mounting brackets in air cleaner body eliminate need for mounting band
Benefits
- Easy servicing due to cover latch position
- Easy disposal due to all-plastic design
- Easy installation due to built-in mounting brackets
- Built-in pre-cleaner eliminates need for external pre-cleaner in most applications
Applications
- Off-road equipment operating in medium-dust conditions with engine airflow range of 2 to 5.9 m³/min / 70 to 207 cfm
- Installs horizontally. Mounting the air cleaner directly to the engine is not recommended; excessive engine vibration can cause premature air cleaner structural failure
- Sustained temperature tolerance: -40º C to 82° C / -40º F to 180° F
- Do not install next to components that exceed the maximum temperature (82º C / 180º F); like a turbocharger, muffler, exhaust pipe or other high temperature component
Resources
Service
This servicing information is provided as a best practices guide. It is not intended to replace or supersede the service instructions supplied by your engine or vehicle manufacturer.

1. Check the restriction
Measure the restriction of the air cleaner with a Donaldson filter service indicator, service gauge, or a water manometer. Replace the filter only when the restriction level has reached the maximum recommended by the engine or equipment manufacturer or on a regular service schedule.

2. Clean out the Vacuator™ Valve
Remove the Vacuator Valve and clean out any dust found in the drop tube. Reinstall Vacuator Valve or replace it if is worn or damaged.

3. Remove the primary filter
Unlatch and remove the service cover on the FKB air cleaner. To remove the primary filter, press and rotate the filter counter-clockwise until free. Then extract the primary filter by slowly pulling it out of the housing.
Note: Avoid dislodging contaminant from the filter as it is removed from the air cleaner housing.

4. Remove the safety filter or liner
Next remove the safety filter (replace at every third primary filter change) or support liner by pulling it straight out. This allows necessary access to properly clean the primary filter’s seal surface.
Inspect the seal surface and housing for any damage. Replace the complete air cleaner if damage is present.
It is not necessary to replace the support liner unless it is damaged. If you are reusing the safety filter keep it clean while servicing the housing to avoid contamination.
Note: If a safety filter or liner is not present, check to see if it has attached itself to the inside of the primary filter during removal. To properly service this small diameter air cleaner, you will need to remove the safety filter or liner upon each filter service.

5. Clean the inside surface
Block the outlet tube of the air cleaner using a small dampened towel prior to cleaning the seal and locking surfaces to avoid contaminating the induction system. With a clean damp cloth, thoroughly clean the inside surface of the housing, seal and lock surfaces.
Note: Failure to clean the inside surface may cause contaminants to be introduced to the outlet tube or onto the seal area of the primary filter during reinstallation resulting in a leak for dirty air.

6. Inspect the new filters
Inspect the new primary and safety filters for any damage, voids, cuts, tears, or indentations in the media or urethane sealing surfaces.

7. Install the safety filter
Remove the dampened towel from the outlet tube that was used to protect the induction system during servicing. Install the safety filter or support liner by pressing it firmly in place until seated. When properly fitted, it should fit snugly inside the outlet tube.

8. Install the primary filter
Install the new primary filter by pressing and rotating the filter clockwise until fully fitted against the stop.
Note: If you perform filter maintenance service on a schedule vs. using service indicators, you may want to write the service date on the filter end cap.

9. Fasten the service cover
The “INLET” arrow on the cover should line up with the air cleaner inlet.
Do not force the cover onto the air cleaner. It should go on easily with no extra force.
Re-fasten the latches which secure the cover. Make sure that latches penetrate the slots in both the body and the cover.
Note: If the cover does not fit flush to the body, the primary filter is not properly seated in the housing. Recheck the primary and safety filter installation following the proper installation procedure so they become fully seated.

10. Reset the filter indicator and inspect the air cleaner system
If your system has a restriction indicator, reset the device.
Inspect and torque all clamps, bolts and connections in the entire air intake system. Check for holes in piping, and repair if needed.


